Preparing Your Space for Flooring Removal
Removing old flooring requires more than just pulling up materials. Preparing the space carefully can save time and prevent unnecessary damage to your home. Start by clearing out all furniture and obstacles from the room. Cover vents, doorways, and nearby surfaces with protective sheets to guard against dust and debris. Good lighting is essential to spot areas that need extra attention or could be hazardous. Additionally, having proper ventilation will make the process safer and more comfortable. Floors that are layered with multiple materials may need a systematic approach to tackle each layer efficiently, and understanding the structure beneath helps you decide which tools to use. Taking these precautions ensures the removal process is smoother and more organized, reducing stress and potential hazards.
Equipping yourself with the right safety gear is equally critical. Gloves, knee pads, and protective eyewear can prevent injuries, especially when dealing with stubborn materials or sharp objects hidden beneath the flooring. Keeping a dust mask or respirator handy is important when removing older materials that may contain harmful particles. Even with careful preparation, unexpected challenges can arise, so having a clear plan for waste disposal, such as arranging a junk removal service or a collection bin, will keep the project manageable. Preparing your space effectively can make the flooring removal process less overwhelming and ultimately more efficient, paving the way for a successful remodel or renovation.
Choosing the Right Tools for Effective Removal
The tools you choose can make a huge difference in the efficiency and safety of flooring removal. Different materials require different approaches. For example, hardwood or laminate may need pry bars and mallets, while tile or vinyl could require scrapers and heavy-duty cutting tools. Ensuring that all tools are in good condition prevents accidents and allows for a smoother workflow. Using the right tool for each material reduces damage to the subfloor, preserving it for your next installation. Investing time in learning how each tool functions before starting can save frustration later, especially when handling stubborn adhesives or tightly secured tiles.
Efficiency in flooring removal is not just about speed but also about minimizing damage. Using powered tools like oscillating multi-tools or floor scrapers can accelerate the process, but improper use can gouge or weaken the subfloor. Combining manual and powered techniques often yields the best results, allowing for precision where needed and power where materials resist removal. Keeping your work area organized, with tools easily accessible, reduces interruptions and streamlines the process. Planning your tool usage strategically can make the difference between a chaotic removal project and one that flows smoothly, preserving the integrity of your home’s structure.
Understanding Material-Specific Techniques
Different flooring types demand different strategies for removal. Hardwood planks may require careful lifting to avoid splintering, while ceramic tiles often need gentle prying and targeted chipping. Vinyl or linoleum might come up in sheets, often requiring heat or solvents to release adhesives. Each material reacts differently to pressure, scraping, and bending, making it critical to recognize these subtleties before starting. Understanding how a material behaves reduces mistakes and prevents unnecessary repair work afterward. Knowledge of material-specific removal ensures the job progresses efficiently and safely, especially in areas where the subfloor must remain intact.
Awareness of these techniques also protects your personal safety. Certain adhesives can release fumes, tiles can fracture unexpectedly, and nails or staples can pose puncture risks. Taking time to learn and implement these approaches allows for careful execution. It is also wise to separate reusable or salvageable materials from waste. Hardwood or tiles in good condition might be repurposed or donated, reducing overall disposal costs and environmental impact. Being mindful of the unique requirements of each flooring type leads to a cleaner, safer, and more controlled removal process.
Managing Adhesives and Residue
After removing the primary flooring material, adhesive residue often remains. Tackling this layer is essential for a smooth and level subfloor. Various solvents and scraping tools are available, but it is important to test methods on a small, inconspicuous area first. Some adhesives are easier to remove with heat, while others respond better to chemical solutions or mechanical scraping. Patience is key, as rushing can damage the subfloor or leave uneven spots that complicate new flooring installation. Addressing adhesive residue properly prevents future issues and ensures the next floor layer adheres correctly.
Safety is paramount when handling chemical solvents or heat sources. Proper ventilation and protective equipment protect your health and prevent accidents. Using a combination of methods—manual scraping, chemical softening, and light sanding—often achieves the best results. Organizing removed residue into manageable piles or a collection system helps keep the workspace clean and reduces hazards. Managing adhesives carefully not only creates a safe working environment but also ensures your home is ready for the next stage of renovation.
Preventing Damage to Subfloor Surfaces
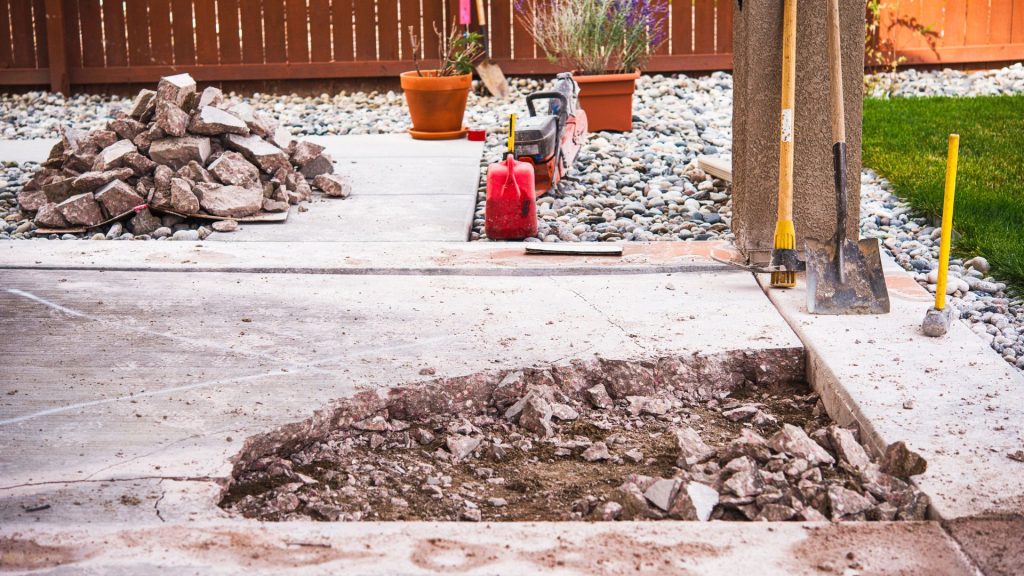
One of the most critical aspects of flooring removal is preserving the subfloor. Whether you are dealing with plywood, concrete, or another surface, avoiding gouges, scratches, or cracking is essential. Start by lifting materials gently, using leverage tools designed to distribute force evenly. Avoid twisting or prying at extreme angles, which can weaken the underlying structure. Inspecting the subfloor frequently during removal helps identify vulnerable spots and allows corrective action before damage becomes severe. A well-preserved subfloor provides a strong foundation for new flooring, avoiding costly repairs or replacement.
Additionally, protecting subfloors often involves pre-planning. Knowing where support beams, electrical wiring, or plumbing lie can prevent accidental damage. Using padded or wide-based tools spreads force over a larger area, reducing concentrated pressure points. Keeping the work area organized ensures that no heavy tools or debris fall onto sensitive sections. Taking these precautions minimizes the risk of structural compromise and ensures a smooth transition to new flooring. Protecting the subfloor is as much about foresight as technique, and careful handling pays off in a durable and professional-looking result.
Safe Handling and Disposal of Waste
Flooring removal generates significant waste, from old tiles and wood planks to adhesives and underlayment. Handling and disposing of these materials safely is vital. Heavy or sharp debris should be handled with gloves and lifted using proper techniques to avoid injury. Sort materials into recyclable, reusable, and disposable categories to reduce environmental impact. Efficient disposal prevents clutter in your workspace, reducing hazards and keeping the project moving efficiently. Planning disposal before starting the project ensures that waste does not accumulate and cause unnecessary delays.
Partnering with a professional junk removal service can make this process much easier. They offer solutions for transporting heavy, bulky, or hazardous materials, allowing you to focus on removal without worrying about cleanup. Establishing a routine for handling debris, such as using bins or designated piles, also keeps the space organized. Safe handling and responsible disposal practices not only protect your physical well-being but also streamline the entire flooring removal process, making the project more manageable and less stressful.
Timing and Sequencing for Efficiency
The order in which you remove flooring can impact both efficiency and safety. Tackling smaller sections first helps establish a rhythm and allows you to assess techniques that work best for the material. Gradually progressing to larger areas prevents fatigue and reduces the chance of mistakes. Planning a sequence that accommodates room layout, material type, and subfloor condition optimizes workflow. Efficient sequencing also ensures that waste disposal and cleaning can happen in tandem with removal, keeping the workspace orderly.
Considering timing also includes scheduling breaks and adjusting for daylight or ventilation conditions. Overworking can lead to mistakes, damage to surfaces, or personal injury. Breaking the project into stages creates a manageable pace and allows for reflection on techniques that may require adjustment. Paying attention to sequencing and timing contributes to a more organized, safe, and ultimately successful flooring removal project.
Addressing Moisture and Mold Concerns
Old flooring may hide moisture damage or mold growth, particularly in basements or areas exposed to spills. Identifying signs of water damage before installation prevents future issues. Inspect the subfloor for discoloration, warping, or a musty smell. Addressing moisture problems involves drying the area, treating mold, and replacing compromised sections before proceeding. Ignoring these factors can lead to expensive repairs and health risks later on.
Using protective gear and proper cleaning techniques ensures safety when handling mold-affected materials. Removing affected sections and treating the area with appropriate solutions prevents recurrence. Monitoring humidity levels in the room and installing a moisture barrier before new flooring installation helps protect your investment. Recognizing and addressing moisture and mold concerns is a crucial step that enhances both the safety and longevity of your home’s floors.
Organizing Tools and Workspace for Large Projects
For larger rooms or entire homes, organization becomes critical. Grouping tools by function, storing debris separately, and keeping frequently used items within reach reduces downtime. Clear pathways prevent accidents and allow for a smoother removal process. Large-scale projects require strategic placement of disposal bins and careful monitoring of progress to avoid overwhelming the space. An organized workspace enhances productivity and decreases the likelihood of damage or injury.
Regularly cleaning the work area as sections are removed maintains a safer environment. Keeping track of tools prevents unnecessary trips to fetch items, while grouping debris by type simplifies disposal or recycling. With a structured approach, even complex removal projects become more manageable, ensuring a consistent pace and quality of work. Organization allows you to focus on techniques and safety rather than logistics, contributing to a more successful outcome.
Preparing the Area for New Flooring
Once removal is complete, prepping the space for new installation is the final step. This includes thorough cleaning, sanding, and leveling of the subfloor. Small imperfections, dust, or leftover debris can affect how new flooring adheres or lays flat. A clean, even surface improves installation efficiency and the durability of your new floors. Taking time at this stage prevents problems and ensures the next phase of your renovation starts on the right foot.
Inspect the entire area for remaining nails, staples, or adhesive residue. Consider moisture testing and leveling compounds if needed. Ensuring proper subfloor conditions contributes to a professional finish for your new flooring. Preparing for new installation is not just about cleanliness but about creating a solid foundation that will support and prolong the life of the updated space. Careful attention to detail here sets the stage for a successful transformation.
Conclusion
Flooring removal can seem daunting, but following best practices ensures a safer, cleaner, and more efficient process. Proper preparation, understanding material-specific techniques, and using the right tools minimize damage and protect your home. Safety considerations, including protective gear and organized workflows, are essential to prevent injuries and maintain a productive environment. By planning disposal, addressing adhesives, and protecting subfloors, homeowners can transition smoothly to new flooring with confidence. Recognizing moisture and mold concerns further safeguards the space, ensuring longevity for future installations.
For those seeking support with heavy debris or large-scale removal, professional junk removal services can provide invaluable assistance. Done Right Haul Away in Maryville specializes in managing disposal safely and efficiently, handling bulky or hazardous materials with expertise. They streamline the process, allowing you to focus on renovation rather than cleanup. For reliable and thorough junk removal, contact Done Right Haul Away at 865-236-0101. Their team ensures that every project is handled responsibly, giving homeowners peace of mind and a clean slate for their next remodeling venture.