Removing carpet from your home can be a big task, but with the right preparation and tools, the process becomes much easier. Whether you’re upgrading to new flooring or need to remove old carpet due to wear and tear, this guide will walk you through the steps of removing carpet effectively. Understanding the process is key to ensuring you don’t face unnecessary challenges along the way.
Preparing for Carpet Removal
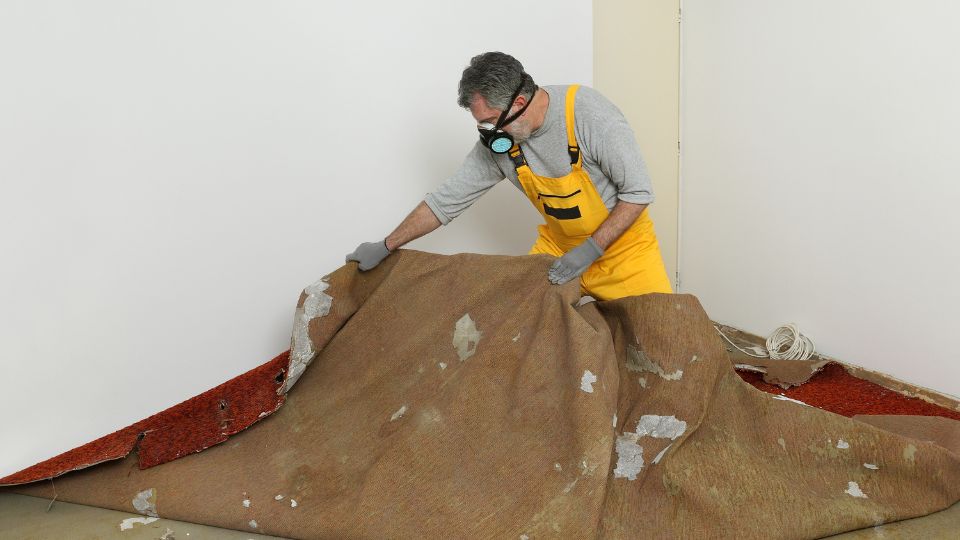
Before you begin removing your carpet, make sure the room is prepared. Start by clearing out the furniture and any obstructions that might be in your way. It’s crucial to have ample space to move freely around the area. You should also ensure the area is well-ventilated to avoid inhaling dust particles. Wearing protective gear like gloves, goggles, and knee pads will help keep you safe during the removal process. It’s also advisable to use a utility knife for cutting the carpet into manageable sections.
Once you’ve cleared the space, you can begin the process of loosening the carpet from the tack strips. Tack strips are the nails used to hold the carpet in place. Cutting the carpet into smaller strips can make it easier to remove and carry out. Carefully cut around the edges of the room and lift the carpet from the tack strips.
Cutting and Removing the Carpet
Now that the carpet is loosened from the edges, it’s time to cut it into strips for removal. Use a utility knife to make several cuts along the carpet’s length. It’s easier to handle smaller pieces, and cutting along the seams will allow you to pull out the carpet in sections without too much strain. If you’re dealing with wall-to-wall carpet, ensure that each piece is about 3 to 4 feet wide. This will make it simpler to roll up and transport.
Once the strips are cut, start rolling the carpet pieces up. This is important for two reasons: first, rolling makes it easier to transport the carpet, and second, it reduces the amount of space the carpet takes up in the disposal container. Ensure that you’re rolling the carpet tightly to maximize the space.
Removing the Carpet Padding
Beneath the carpet, you’ll often find carpet padding, which adds comfort and insulation. Removing the padding is a necessary step for a clean finish. Carpet padding is typically stapled to the subfloor, so you’ll need to pull out the staples or nails holding it down. Begin at one corner and gently pull up the padding in sections. Be careful not to tear it too much, as you’ll need to discard it later.
Once you’ve removed the padding, check for any remaining nails or staples. It’s important to remove these to avoid damaging the subfloor or making the area unsafe. Use a staple remover or pliers to take out any stubborn fasteners. You should now have a completely clear space, ready for new flooring or further prep work.
Dealing with Tack Strips
Tack strips are small, narrow wooden pieces that are nailed into the edges of your floor to secure the carpet in place. After removing the carpet and padding, these strips must be taken out. Since they are often firmly attached to the subfloor with nails, removing them can be tricky. Start by using a pry bar to gently lift the tack strips from the floor. It’s important to be cautious during this step, as the nails on the tack strips can be quite sharp and may cause injury if mishandled. Once the strips are loosened, you’ll be able to remove them with care, ensuring that no damage is done to the subfloor beneath.
After successfully removing the tack strips, you may encounter some residual nails still embedded in the subfloor. These can be a bit stubborn, but with the use of a hammer or pliers, you should be able to pull them out without much trouble. It’s crucial to make sure that the subfloor is completely smooth and free of any nails or debris, as this will help in laying down new flooring or refinishing the area. Once all the nails are removed, take the time to sweep the floor thoroughly, ensuring it is dust-free and ready for the next phase of your renovation or installation process.
Cleaning the Subfloor
Once all the carpet, padding, and tack strips have been removed, cleaning the subfloor is the next essential step in the process. A clean subfloor ensures that no dirt, dust, or debris will interfere with the installation of your new flooring. Take the time to sweep or vacuum any remaining particles from the floor to make sure it is completely dust-free. This will create a smooth and solid foundation for whatever type of flooring you plan to install, whether it’s new carpet, hardwood, or laminate. It’s important to leave no small debris behind, as it could impact the quality of the final result.
If your subfloor has any visible stains or signs of damage, it’s a good idea to give it a thorough cleaning. Depending on the material, use a floor cleaner that is suitable for wood or concrete surfaces. Using the correct cleaner is crucial for preserving the integrity of the subfloor, especially if you plan to install delicate flooring such as hardwood or laminate. Ensuring the surface is clean and dry will also help prevent future issues, like moisture or mold, from forming beneath the new flooring, which can cause long-term damage.
Proper Disposal of Carpet and Padding
Once the carpet and padding are removed, proper disposal is the next essential step. Unfortunately, carpet and padding are generally non-recyclable materials, which means they are often destined for a landfill. However, many junk removal companies specialize in handling bulky waste like old carpet and padding, offering convenient and responsible disposal services. By choosing a professional junk removal service, you can ensure that your carpet is disposed of in an efficient manner, avoiding the hassle of handling the materials yourself. These companies are equipped with the necessary tools and expertise to transport large items safely and efficiently, reducing your workload and ensuring compliance with local waste management regulations.
It’s always a good idea to check with your local waste management facility to understand any specific rules they may have for carpet disposal. In many areas, carpet must be cut into smaller pieces before it can be accepted at the landfill, so be prepared for that extra step. If you’re looking for a more environmentally friendly solution, some recycling centers may accept old carpet for repurposing or recycling, though availability depends on your location. Before disposing of your carpet, research your area’s options to ensure you’re following the correct disposal guidelines while also considering the environment.
Preparing for New Flooring Installation
Once the old carpet is removed and the subfloor is cleaned thoroughly, you’re now ready to prepare for your new flooring installation. The first step is to assess the condition of the subfloor. If you’re installing new carpet, ensure that the subfloor is smooth, dry, and free from any debris. For hardwood or laminate flooring, you’ll likely need to install an underlayment or foam padding to create a stable, even surface for the new flooring. This underlayment acts as a cushion and helps absorb sound, making the floor more comfortable to walk on while also providing additional moisture protection for hardwood floors.
If you’re opting for new carpet, don’t forget to install a carpet pad beneath it. A carpet pad is essential for enhancing comfort and durability. It acts as a protective barrier that helps prolong the lifespan of your carpet by reducing wear and tear. Be sure to cut the carpet pad to fit the dimensions of the room perfectly and lay it down smoothly, ensuring no lumps or wrinkles. Once the carpet pad is in place, you can then proceed to install the new carpet, stretching it tightly and securing it with tack strips to ensure it remains firmly in place.
Renting a Dumpster for Carpet Removal
If you have a large area to remove carpet from, renting a dumpster might be the most convenient option for disposal. Carpet removal can generate a lot of waste, and renting a dumpster provides an easy solution for handling that waste. With a dumpster, you can easily dispose of carpet, padding, tack strips, and any other debris without having to make multiple trips to the landfill.
Before renting a dumpster, check with the rental company to ensure they accept carpet waste. Some companies may have specific guidelines or additional fees for carpet removal. It’s also important to make sure that the dumpster is large enough to handle the volume of waste generated by your project.
Hiring a Professional for Carpet Removal
If the thought of removing carpet on your own seems overwhelming, hiring a professional junk removal service may be the best option. Professional junk removal companies have the tools and expertise to remove carpet quickly and efficiently, saving you time and effort. They also handle the disposal process, so you don’t have to worry about figuring out how to dispose of the carpet and padding.
When hiring a professional, be sure to check their credentials and reviews to ensure they are reliable and trustworthy. A reputable company will provide you with a clear estimate of the costs and ensure that the job is done properly. Hiring a professional can make the entire carpet removal process much easier and stress-free.
Conclusion
Carpet removal can seem daunting, but by following the right steps, you can ensure that the job is done efficiently and safely. From preparation to disposal, each phase of the process is essential for a successful outcome. If you need assistance with carpet removal or want to ensure that the job is done correctly, consider reaching out to a professional junk removal service.
At Done Right Haul Away, we specialize in providing expert junk removal services in Maryville, TN. Our team is dedicated to making your carpet removal project as hassle-free as possible. For more information or to schedule a service, give us a call at 865-236-0101 or email us at zach@donerighthaulaway.com.